Перейти к информации о продукте


Ront Oxygen O2 Sensor Replacement for Harley O2 Sensor Replacement 2010-2016 Touring FLT FLH 2015-2020 Street XG500/750 27729-10
Цена со скидкой
$33.19
Обычная цена
$36.88
- Type:4-wire, Product Fit:Direct Fit
- Each item is strictly tested before shipment.
- Improve the purification rate, improve the engine performance.
- Processing technology is excellent, good accessory material selection,resistance to high temperature and corrosion resistance, increase the life span.
|
|
|
|
|---|---|---|
|
|
|
|
|
|
|
|
|
|
|
|
|
|
|
|
|
|
|
|
|
|
|
|
|
|
|
|
|
|
|
|
|
|
|
|
|
|
|
|
|
|
|
|
|
|
|
|
|
|
|
|
|
|
|
|
|
|
|
|
|
|
|
|
|
|
|
|
|
|
|
|
|
|
|
|
|
|
|
|
|
|
|
|
|
|
|
|
|
|
|
|
|
|
|
|
|
|
|
|
|
|
|
|
|
|
|
|
|
|
|
|
Oxygen Sensor Failure Performance:

Detect the resistance of the oxygen sensor
When the engine temperature reaches normal, unplug the wire connector of the oxygen sensor and use a resistance meter to detect the resistance between the oxygen sensor terminals. The resistance value should meet the requirements of the specific model standard value (generally 440Ω)

Detecting oxygen sensor voltage
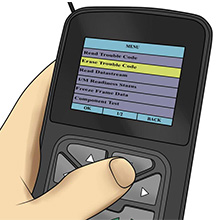
Use the fault diagnosis instrument to detect the engine, extract the fault code, and observe the data stream. The operation of the oxygen sensor is judged by the magnitude and frequency of the voltage change of the oxygen sensor. If it is working properly, the voltage should be between 0.4 and 0.6V. If the voltage is always at 0.45V, the oxygen sensor will not work.

Observe the appearance color of the oxygen sensor probe
- Oil pollution: the surface of the probe is covered with a white or gray-black oily deposit on one side.
- Silicon poisoning: probe deposit color between bright white and granular light gray
- Lead poisoning: shiny rust layer on the probe surface
- Antifreeze contamination: a layer of dirt on the surface of the probe
How to install the oxygen sensor?
1.Identify the faulty sensor.
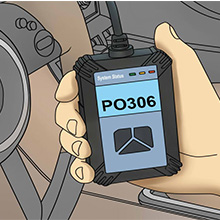
Before beginning, connect the OBD II scan tool to the vehicle and read the codes to determine which specific oxygen sensor has failed and needs to be replaced.Once the faulty sensor has been identified, raise the vehicle and secure it on jack stands. Be sure to raise the vehicle on the side which you will allow you to access the oxygen sensor that needs to be replaced.

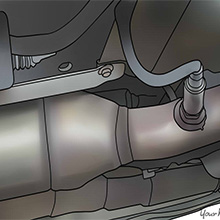
2.Removing the Old Sensor.
Disconnect the electrical connection to the oxygen sensor.To remove it, locate the small tab on the end of the plug. While pushing the tab down, pull the plug back by hand.Avoid attempting to cut and then solder the wires to the new oxygen sensor. And then unscrew the oxygen sensor using a ratchet wrench.The easiest way to detach the sensor is by using a 3⁄8 in (0.95 cm) ratchet wrench fit with a 7⁄8 in (2.2 cm) oxygen sensor socket.
3.Installing the New Sensor.
Turn the sensor clockwise to secure it on the exhaust line. Fit the tip of the sensor into the hole on the exhaust line. Make sure it is centered and goes in smoothly as you begin rotating it clockwise by hand. Once it is tightly in place, use an oxygen sensor socket or open end wrench to give it a final turn.And then plug the electrical connector back into the vehicle. The cable will be hanging from the free end of the sensor. Plug it into the outlet port close to the exhaust line.Push the plug in until it snaps into place. Make sure the cable isn’t touching the engine or other parts that heat up when the vehicle is in use.
4.Start the vehicle.
Start the car to see if the problem is fixed. In some vehicles, you may need to clear the check engine light manually. Shut off the engine, then turn the car’s power on using the ignition key. Use the delete feature on an OBD code scanner to reset the light.Disconnect the battery or take the vehicle to a mechanic for additional ways to shut off the check engine light.If the check engine light comes back on, either the oxygen sensor wasn’t installed correctly or your vehicle has another problem.